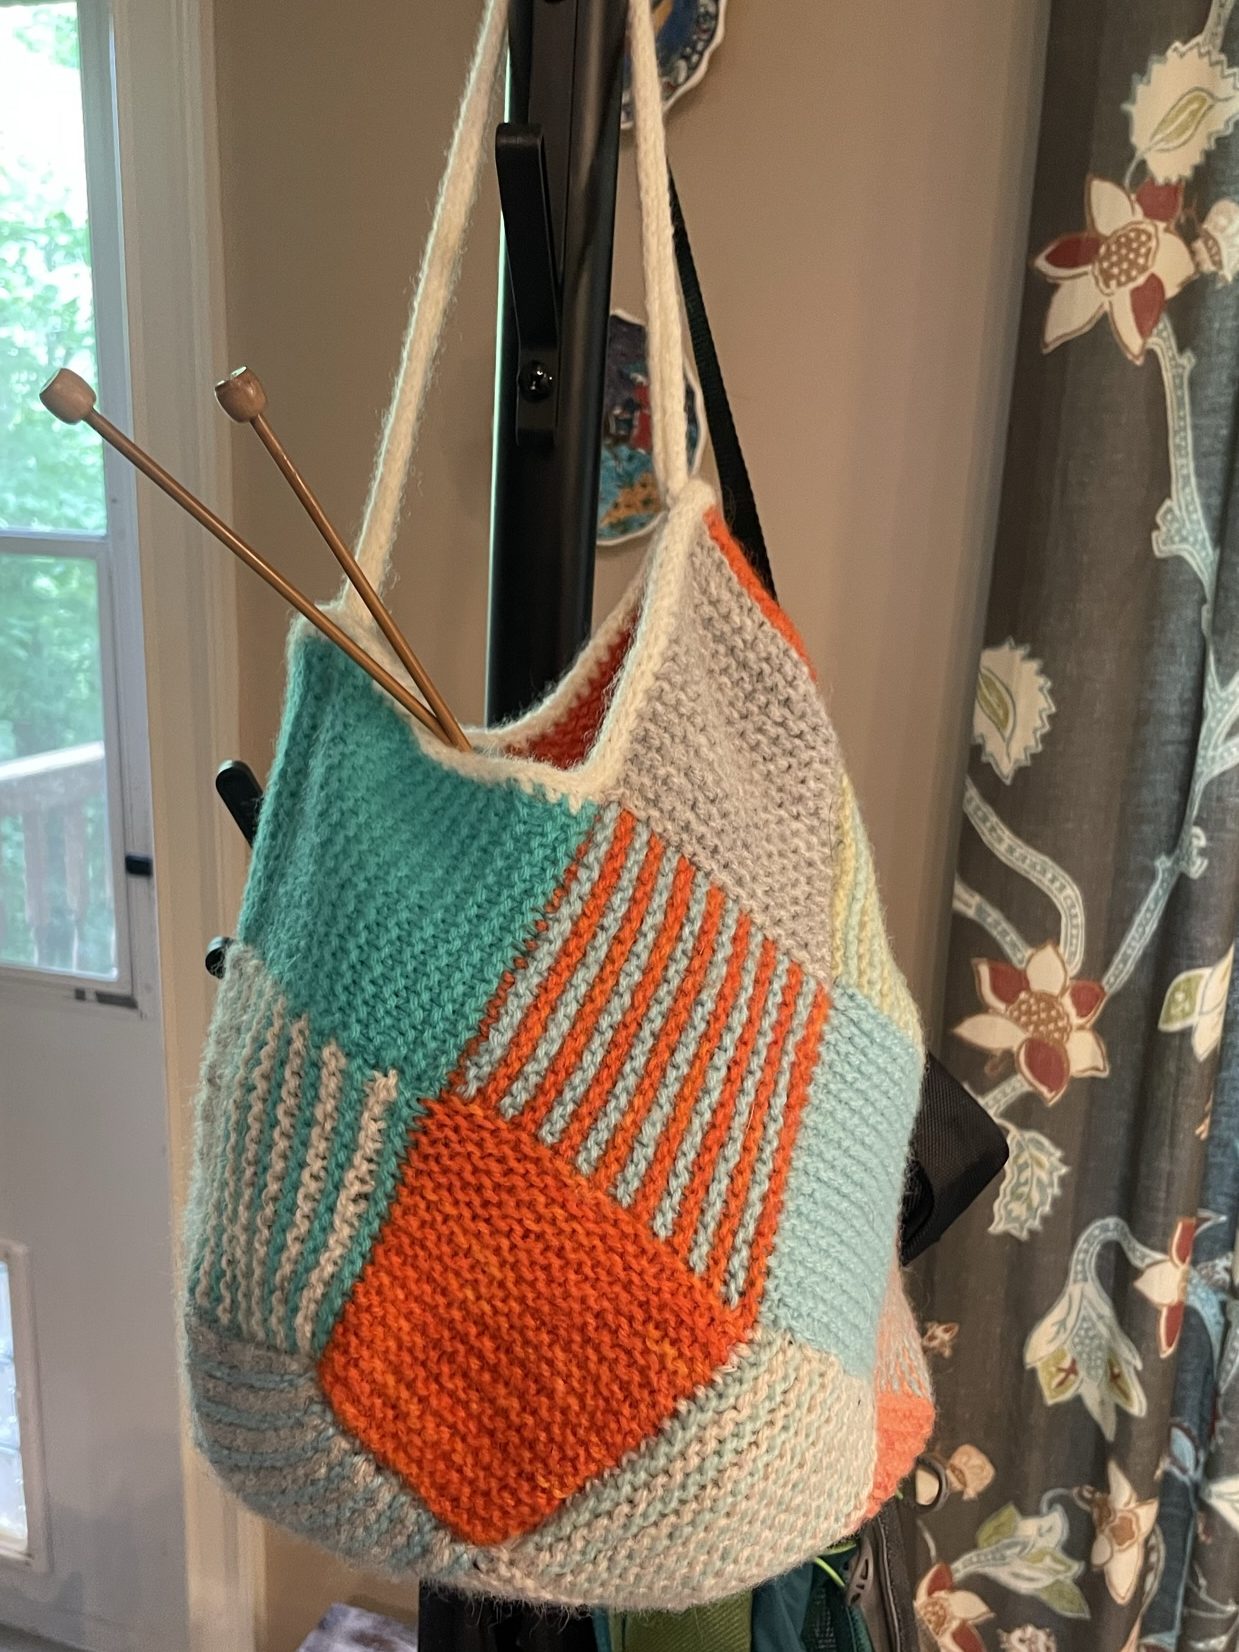
Final Week!

Now that you’ve joined all the squares, you’re ready to knit and add the strap, knit the edging and felt your bag.
You will notice that there are no new techniques in week #4, except for the felting, which is super easy. Feel free to refer back to the previous KAL posts to check out the videos suggested for seaming and picking up stitches.
Final Details
We’ll be adding edging and the straps in the opening area. Look at the illustration below, it’s much easier to figure out after joining all the squares together. I promise, it’s super easy. Just follow the following steps described in the next section.
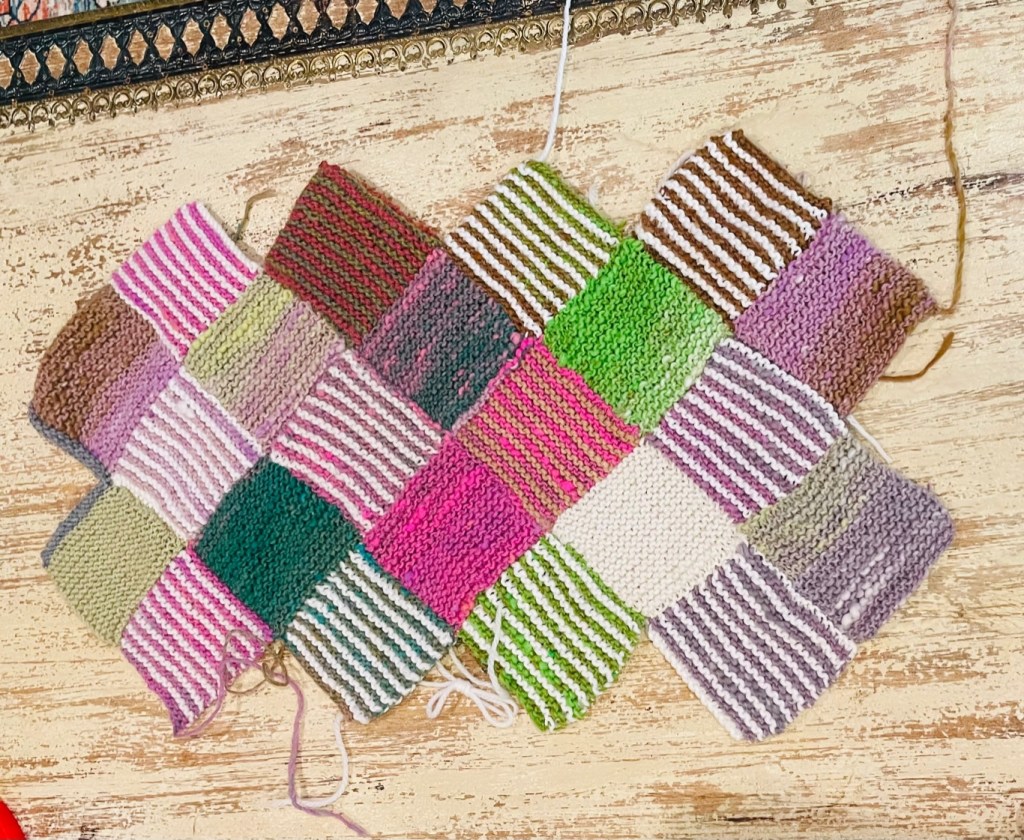
1. Place all your seamed squares on a flat surface
First, start by laying out the all the seamed squares on a table or on the floor so you can see more clearly which sides to seam. After you seam the first two squares, the bag will begin taking a 3D shape, don’t think you made a mistake, that’s what we want. Note that in the picture below, I decided to make 12 striped squares and 10 solid color squares, but the concept is the same.
2. Follow the graphic below and seam your first two squares
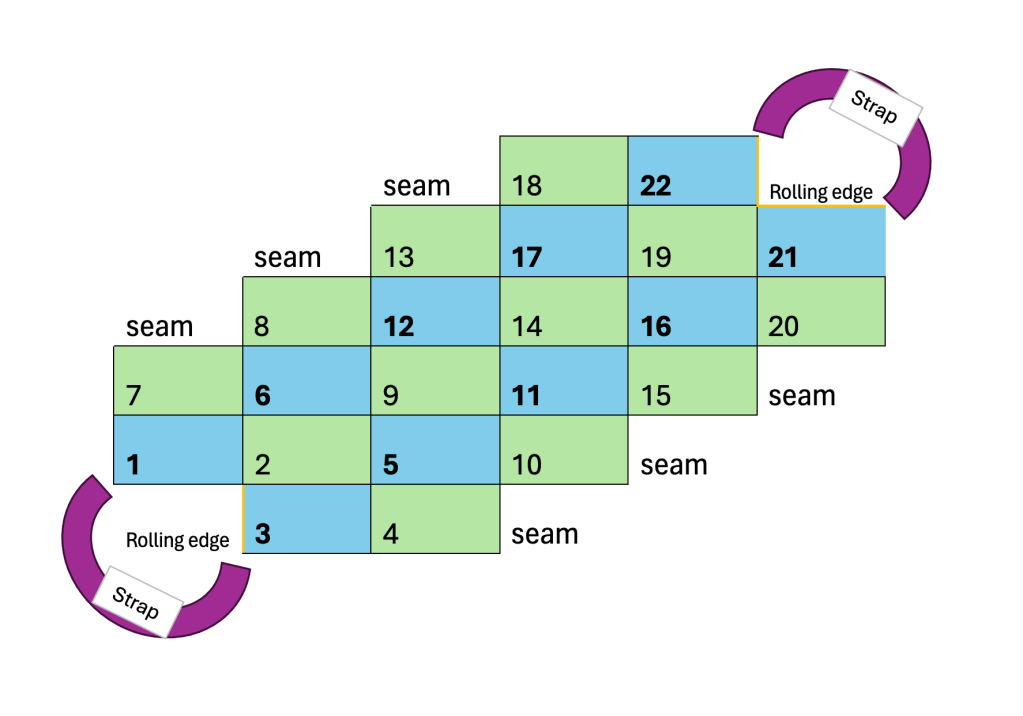
First two seamed squares
I decided to start seaming the two striped squares on the right.

3. Notice the 3D shape
As you can see, the bag starts taking a 3D shape as soon as you seam those first two squares. Keep seaming your squares following the graphic above. Remember to not seam the two openings. I loved seeing how the bag folded into the right shape as I seamed the second square. After that I became very clear how all the pieces worked together.
Keep going until all the sides are seamed and only the back and front opening are left.
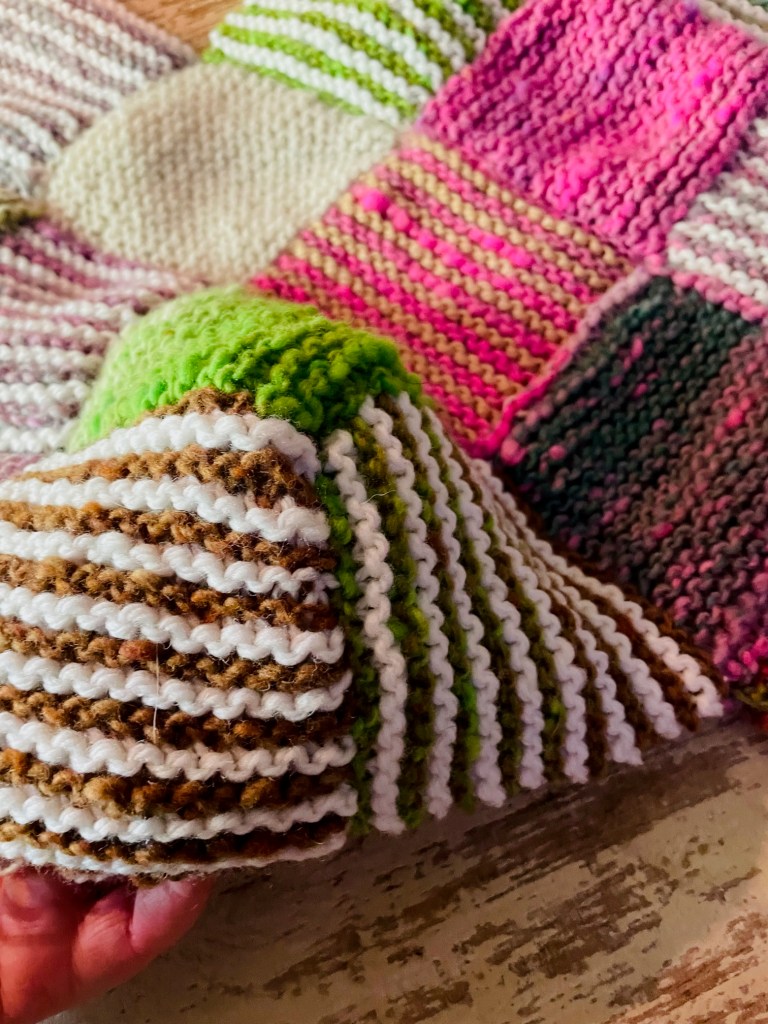
Rolling Edge
You may knit the rolling edge before doing the final seaming or afterwards, it does not matter.
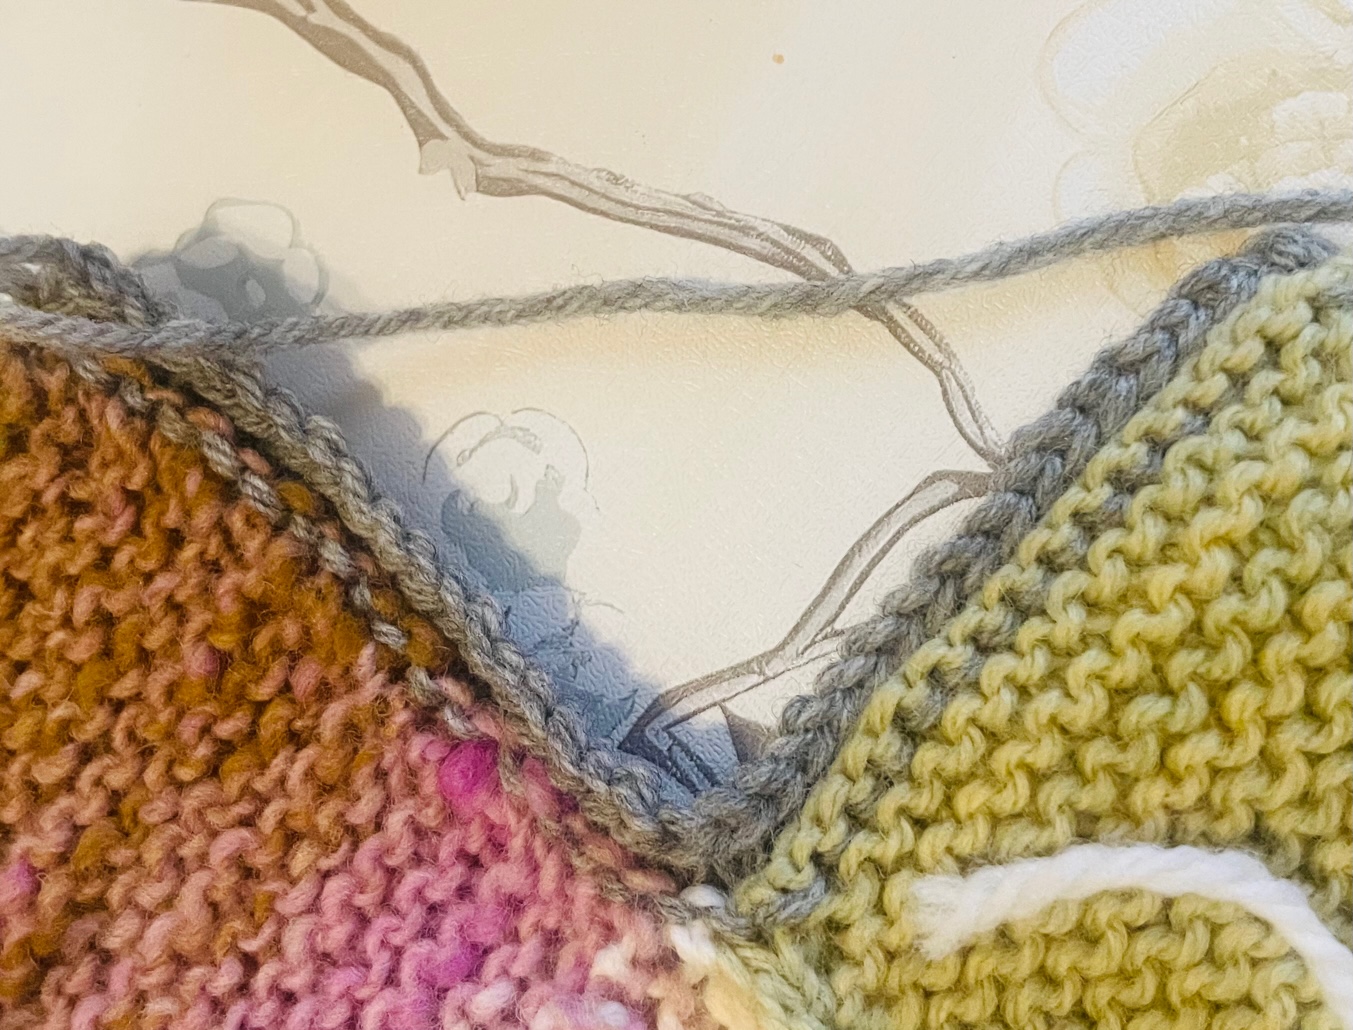
Step 1: Pick up 35 st.
We’ll knit an easy rolling edge for the bag. Grab a yarn in a contrasting color for this part.
Starting with the front of the bag, and with the RS of the fabric facing you, pick up and knit 35 stitches in the front opening: 17 st from squares #1 and #3, and 1 st from square #2 (striped square). *These are the squares where you placed your stitch markers.
Step 2: Rolling Edge
The picture above shows how the edging will look in the back of the fabric. Row 1 (WS): K
Row 2 (RS): P
Row 3 (WS): BO all st.Now, repeat the same steps for the back.
Note: when you’re done the edging will roll forward and it’ll all look like purl stitches, that’s what we want.
Alternative Edging: if you’re a more advanced knitter, you can also add an applied i-cord edge.
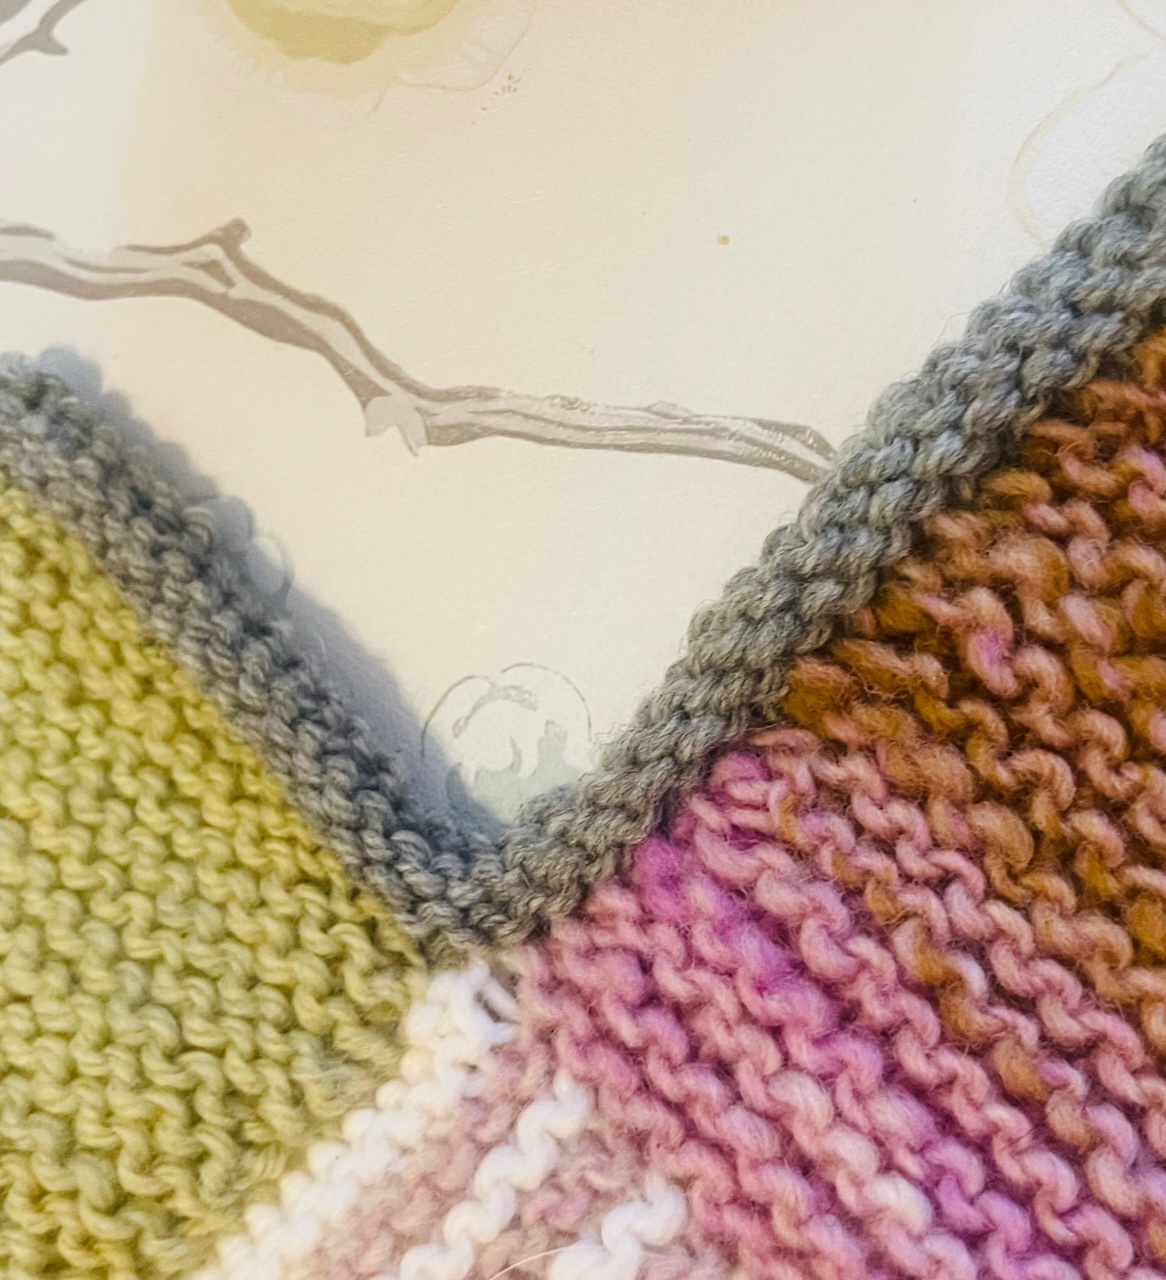
Strap
For the strap we’ll use the same rolling technique, except now the side stitches will roll inward forming almost a tube. All the stitches will look like knit stitch.
With the contrasting color yarn, cast on 10 st.
Work in stockinette st until your strap measures 20” or your desired length. BO all st.
Seam the strap to the edges (where the rolling edges meet in the sides of the bag.
Almost there! Weave in Ends
You’re done with the knitting part. Now, weave in the yarn tails. If you plan on felting it, don’t worry too much about weaving in tails perfectly. Felting will help the fiber stay together.
Last Step: Felting
This is the last step, yay! The best part is that it’s super easy. Felting will shrink the fabric a bit (or a lot depending on the agitation and water temperature). I felted my bag lightly by just throwing it in the washing machine in the normal cycle, which uses warm water and moderate agitation. Feel free to felt it more if you’d like the fabric to be more dense and sturdy.
Instructions for felting:
- Place your finished project bag in the washing machine with some towels and set it in the normal cycle with warm water (hot water will felt it more if you’d like it more felted) with some mild soap such as Eucalan.
- After the cycle is done, take out your bag and shape it with your hands to make sure the fabric looks even.
- Lay flat to dry, take some pictures and enjoy!
Note: If you want to felt it even more, just repeat the first step.
You did it!
Congratulations! You’re officially a knitter. Your WIP (work in progress) is now a FO (finished object). You’ve knitted an awesome project bag. Be proud of all of your work and share your pictures with us on Instagram!